
Despite living in the fairly damp Northwest of the UK I’ve had my heart set on making a fully functioning outdoor low carbon kitchen with found and scavenged parts. My reasons for wanting this kitchen were many, I love working and being outside in the garden and already cook there quite a lot already on a smaller portable rocket stove, I also don’t want to use gas to cook my food on that is fracked from sites half an hours drive away from where I live, and the fact that it can all be made for free.
Make the Rocket Stove
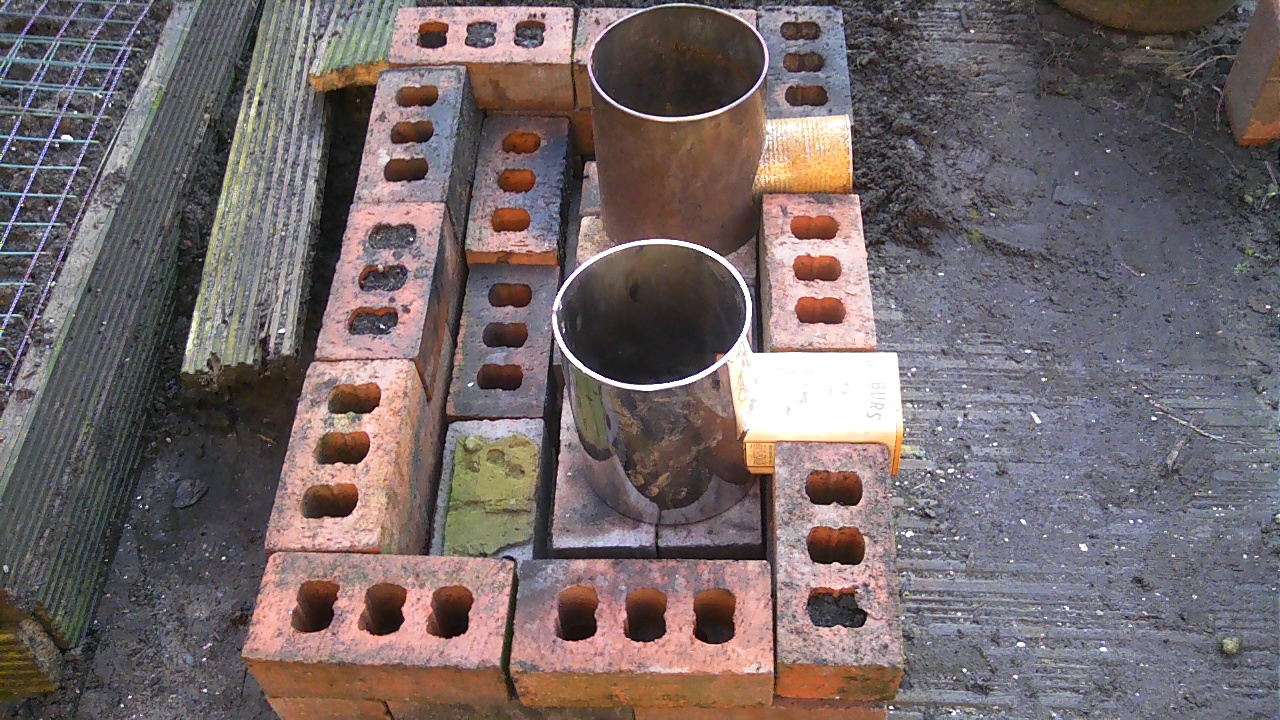 The first part of the kitchen to make is the all important rocket stove that is going to be used to power the kitchen. It was time to go out foraging in the ever fruitful alleys of Great Lever in Bolton where I live, the first thing I found at the end of an alleyway was a pile of sturdy old stock bricks, and a part bag of builders sand, then I was lucky enough to find two small stainless steel pedal bin outer casings a few days later. The design that I had decided upon for the rocket stove cooker was a twin burner insulated by layers of cob plaster and cob. The other materials I needed to make the stove I already had, such as some bits of straw to bind the cob together, some clay rich soil, and some pure clay which I slaked over night to enable it to mix better and bind the other ingredients together.
Making the base of the stove
 There are probably dozens of ways of designing the base for a stove like the one I made, I chose a really basic design of making a rectangular brick base with the two burners in the left and rights spaces of the rectangle, I then added cob around the base of the burners and left the cob to dry out for a day or so. A word of warning, if you plan to make anything like this in the UK using cob you will probably need to get hold of a cover for it to protect it from the relentless rain
Building up the insulation layer of cob
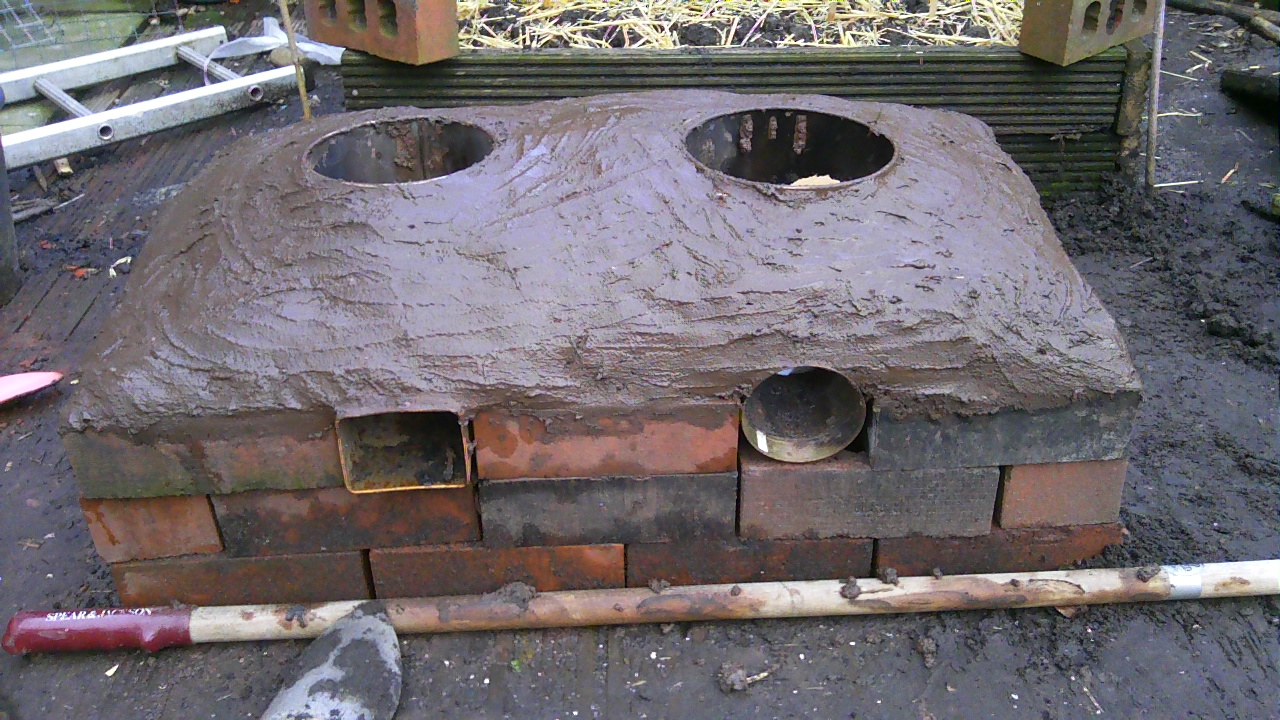 The next job after building the base layer of cob up is to add cob plaster around the stoves burners, I used plaster as opposed to cob to avoid any risks that might occur with the straw in the cob and the high temperatures generated by the stove when it is in full flight. I also let this layer of plaster dry out for a few days before adding a thick layer of cob around the plaster and covering all remaining areas of the base of the stove with cob. As we are still in the winter in the UK and still with the appalling unseasonal weather I opted for covering the stove up at night with a small waterproof tarpaulin and as I mentioned above the stove should generally be covered when it is not in use .
Ready to use
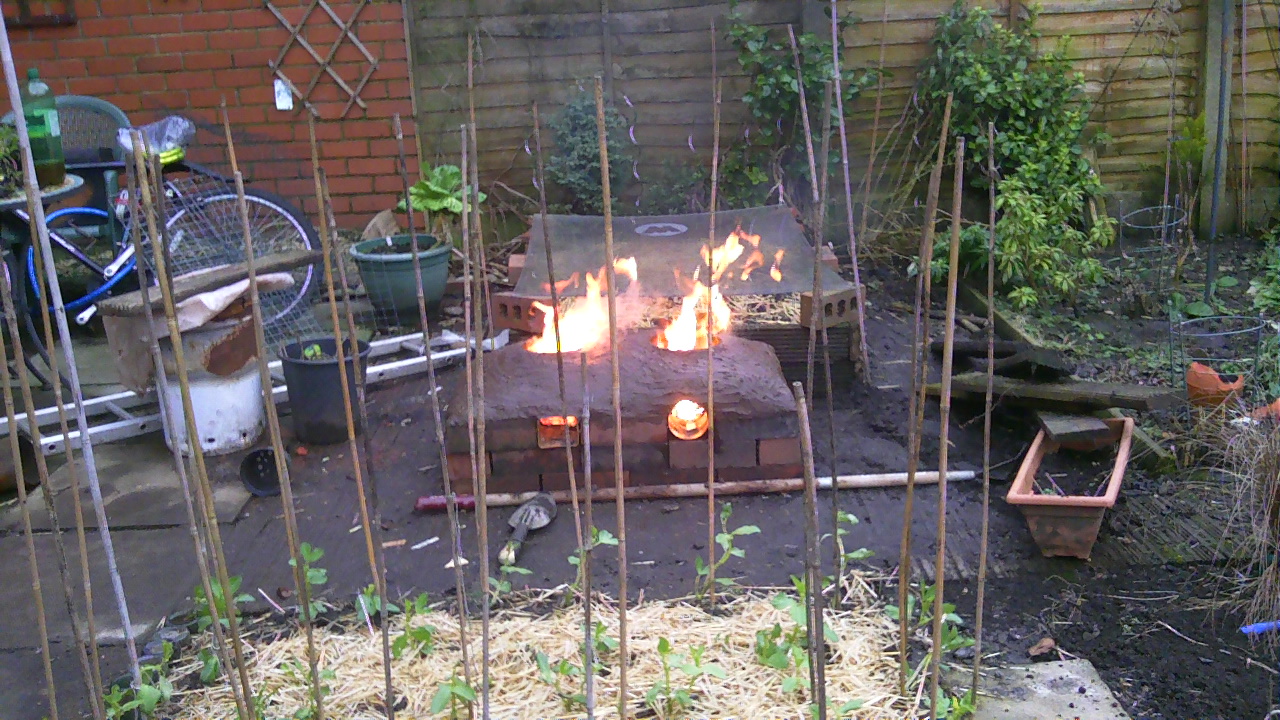 Once the layer of cob had been sufficiently built up on the body of the stove, the next thing to do is to light both burners and have a small but steady fire in each burner, the purpose of having these small contained fires is help to dry the cob out, keeping the fire small but consistent helps to reduce any cracks that might appear in the cob whilst it is drying out. Once you light the fires in the burners they will probably look quite fierce until the fire calms down to when you can only just see the flame peeking out above the burners.
Steve